


Innomedia VoIP Router Configuration
Follow these simple steps to install and activate your Innomedia 2-Line VoIP router:
Connect the Innomedia 2-Line VoIP router from its LAN port to your computer.
Make sure your computer is set to "DHCP" mode.
Within a few seconds, your computer should acquire an IP address in the 192.168.99.X range.
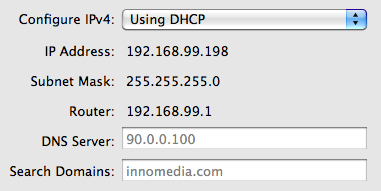
Type the following URL in your browser to access the Innomedia 2-Line VoIP router's interface:
You will see a login screen:
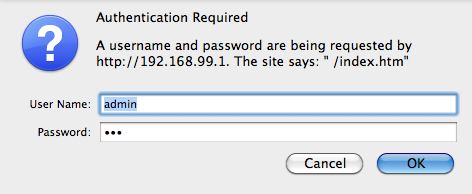
Contact us for the default login/password.
Once you are logged in to the Innomedia 2-Line VoIP router, you will see the current status of both lines.

Contact us with the MAC Address of your Innomedia 2-Line VoIP router and we will activate it on the plan you have selected.
Click on Router Settings and adjust your Uplink and Downlink Speeds in kbps based on your service provider's CIR speeds

Example: 256kbps Uplink, 640kbps Donwlink with our iDirect Business Class Med 4-Watt plan.
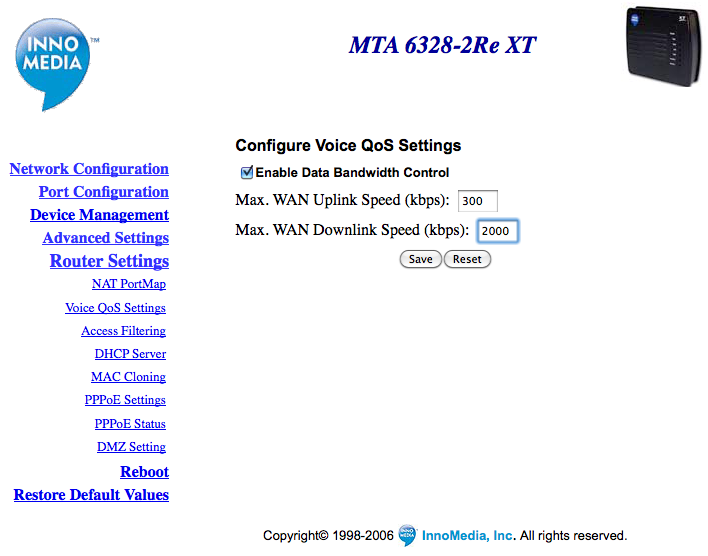
Click on the Save button and confirm the change.

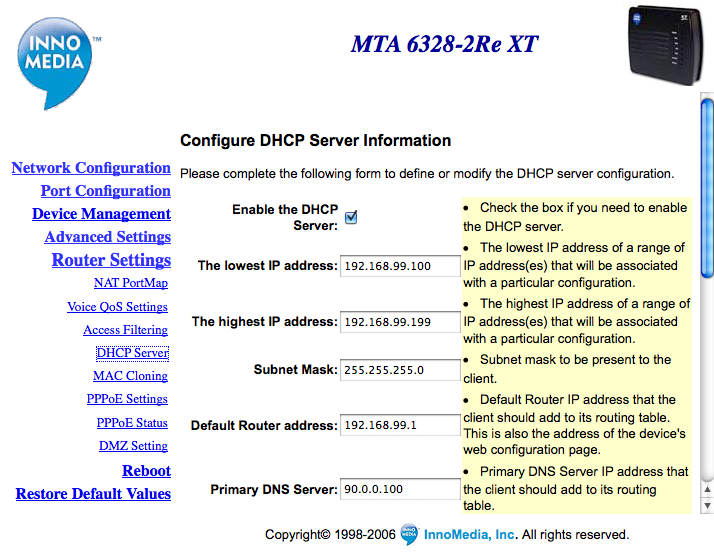
If your Innomedia 2-Line VoIP router is connected to an existing LAN, you may want to disable its LAN DHCP server feature via the Router Settings and DHCP server menu. Alternatively, if you wish to use the DHCP server feature, you may configure it according to your needs.
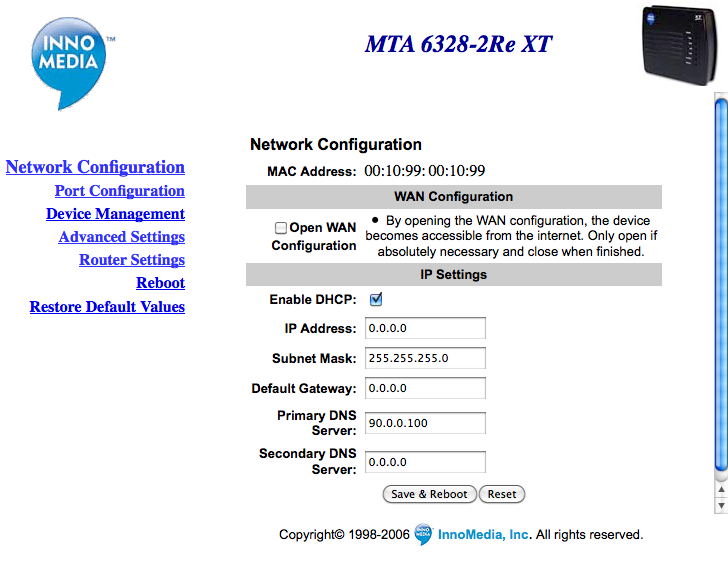
If your Innomedia 2-Line VoIP router is connected to a Satellite Modem or any form of Internet access with DHCP capability, it will acquire an IP address for its WAN port automatically. If you wish to configure the router's WAN parameters manually, you may do so in the Network Configuration menu:
Fee free to contact us if you have any questions!