


Promax Quick Start Guide
The best way to familiarize yourself with your new Promax analyzer and get started is to read the instruction manual.If that's too much to ask, you can read the following quick start guide which is by no means a complete tutorial.
 Turn on your analyzer by pressing the dial for at least 3 seconds. The instrument will turn on. You can see the firmware version during the boot sequence.
To align a satellite dish, make sure that "S" is selected on the mode button (#5). If that's the case, the frequency in the upper right corner of the screen should be between 950 and 2150MHz.
Press the format button (#.) to select your satellite. At the very top of the menu, select your satellite by hitting the dial key once and going through the list of available satellites. When the satellite you are looking for comes up, hit the dial one more time to select it.
Scroll down the screen until you get to the LNB LOW OSC and LNB HIGH OSC values. Make sure both values are correctly set for the type of LNB(F) you are using (10.750 for standard Ku, 11.250 for DBS and 5.150 for C-Band). You can enter your L/O values by hitting the dial once, entering the values with the keypad and hitting the dial one more time once each value has been entered (one at a time).
Press the format button (#.) one more time to exit the menu.
In quick spectrum mode (#9), you can rotate the dial to jump from transponder to transponder as defined in the selected table for this satellite. The IF frequency will appear in the upper right corner of the screen while the actual frequency appears at the bottom of the screen. Please note that the satellite definition tables in this instrument contains only frequencies for Mpeg-2 DVB carriers. If the carrier you are looking for is not in Mpeg-2 DVB or even if it is but it's not in the list, press the Preset button (#0) to switch between Preset and Manual IF mode. In Manual mode, you may punch in any IF frequency you want with the keypad.
 If you are using one of the preset frequencies, the voltage being sent to the LNB should be automatically selected (13V for V and 18V for H). In manual mode, use the voltage button (#2) to select the appropriate voltage to send to the LNB(F).
Once a carrier is lined up on the marker, hit the quick Search button (Green button) to identify the carrier. If the carrier is Mpeg-2 DVB, the network name may appear at the bottom of the screen. Note that not all Mpeg-2 DVB carriers contain identification information. Hit the TV button (#1) to see any in-the-clear Mpeg-2 transmissions (audio or video). If the transmissions are scrambled, you will still be able to see the Audio and Video bitrate for each selected channel.
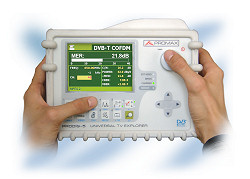
To peak your dish, go to measurement mode by pressing the measures button (#3). In measurement mode, hit the measures button repeatedly to switch values in the top portion of the screen. The MER value is very useful to peak your dish.